I
started making yogurt around the time that I got interested in making
my own cheese. The whole concept of food preservation is very
interesting to me, from a practical, as well as scientific perspective.
The “alchemic” reactions of bacteria, given certain environments, and
the ability of acidity or pressure and heat to kill off harmful
bacteria. Everything from canning to drying and salting, fermenting
pickles to culturing cheeses and yogurt.
I
am still working on finding the patience needed for good cheese making,
but since yogurt is so simple and easy to do and I love it and it is so
much more delicious and better for you than the vast majority of
yogurts you can get in grocery stores, I keep on making it. The best
yogurt I can find in store, is a little expensive, given my extensive
consumption habit, and being able to extend the life of my milk if I
find I have too much to consume before it goes bad, is a wonderful
thing. I have touted the glories of making your own yogurt to many
friends and promised to share my methods so many times, that I figured I
would share it here also.
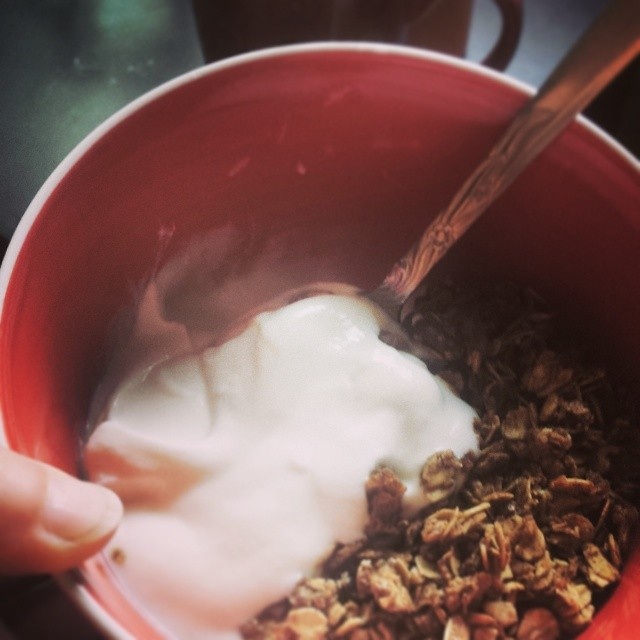
Homemade Yogurt with Homemade Granola
One
important note, before we get started on yogurt making methods, is that
of the importance of cleanliness in this whole process. It is very
important to be sure that all of the pots, pans, bowls, jars, and
utensils coming in contact with your milk and yogurt in this process are
very clean, so as not to introduce any “bad” bacteria. On the flip side
of this, the introduction of any detergents lingering on any of the
above mentioned gear can also kill the “good” bacteria, leading to
unsatisfactory results. I would recommend cleaning with a very small
amount of mild soap, and very hot water, and rinsing very
well. Alternatively, you could boil any of the gear that can be boiled
for about 10min to sterilize or wash with vinegar, and rinse. However
you choose to do it, just be sure that the equipment is quite clean and
no longer soapy.
Homemade Yogurt Recipe:
Equipment:
- heavy bottomed stainless steel pot
- cheese thermometer (or any good thermometer including the range 100-180)
- large, wide bowl (optional, preferably stainless steel)
- funnel
- jars
- small cooler
- towels
- hot water bottle, or rice bag, etc
Ingredients:
- good quality, plain Yogurt with live cultures 1Tbsp/Qt of milk used (the fewer ingredients the better) Locally, I use Thomas Organic Creamery, plain yogurt.
- Milk
equal to the amount of finished yogurt you desire, preferably milk that
has not been “ultra pasteurized” (pasteurized is ok) Locally, I use Calder Dairy, whole milk. * here is a link to further information on this topic

Heating up the milk to 180
Begin
by heating the milk in the stainless steel pot, over medium heat,
stirring occasionally, until milk reaches 180 degrees. Remove from heat.
Cool milk to 110 degrees, this can be done in a large, wide bowl,
stirring will help the milk cool more quickly.
While
milk is cooling, prepare cooler, by adding towels and hot water bottle.
Prepare jars by heating with warm water (to prevent cracking). Add
1Tbsp of yogurt to each quart jar.

Waiting for the milk to cool to 110
Once
milk has reached 110 degrees, pour into each jar, cap and shake gently
to mix in yogurt. Place jars in cooler, wrap with towels and set the
water bottle on top. Use the thermometer to ensure that the internal
temperature of the cooler stays between 100 and 116 degrees. Prop the
lid open to vent if needed. When cooler is at correct temp, close and
leave undisturbed for 6 or more hours. After 6 hours, the jars can be
checked by tilting to the side and looking to see if the yogurt pulls
away from the side of the jar. There will be some clearish liquid in the
jars also, this is whey, it can be poured off, and either saved (click here for uses)
or discarded. I would not suggest leaving the yogurt to set any longer
than about 8 hours. Then it can be placed in the refrigerator. You can
save some of this yogurt for the next time you make yogurt and it
becomes a kind of daisy chain of delicious, good for you yogurty
happiness.
The
key reason, I find this yogurt to be superior to most store bought
yogurt, is that in the manufacturing process, most products are
completely decimated by over pasteurization, then the beneficial
bacteria have to be added back in after the fact. The vast majority of
yogurts also have a lot of additives, which I really don’t want. If I
buy yogurt, I’d like it to be just yogurt.
Here is a link to the place I learned to make yogurt, and a link to some good troubleshooting. If you try this and have any questions, please do feel free to leave a comment below, I’ll do my best to answer any question.
Happy Yogurting!
No comments:
Post a Comment