Sunday, September 28, 2014

Hunt, Gather, Stretch: Yoga & Hunting

I am an avid reader of the Women’s Outdoor News (WON). Not only are they a great news resource for what is going on in the worlds of hunting and shooting as it pertains to women, it is also like any other outdoor magazine, with the tiny modification, that instead of articles all about men and written by men, it is written by and about women. It’s about time :)

WON_frontpage.jpg

Recently I read an article about Yoga for Duck Hunters, and I quickly remembered how I had turned to Yoga this spring during my long days in the turkey blind. There is an altogether different kind of fatigue that comes from sitting quietly in a confined space for 12 or so hours. The relief that even a few imperfect Yoga poses can bring 
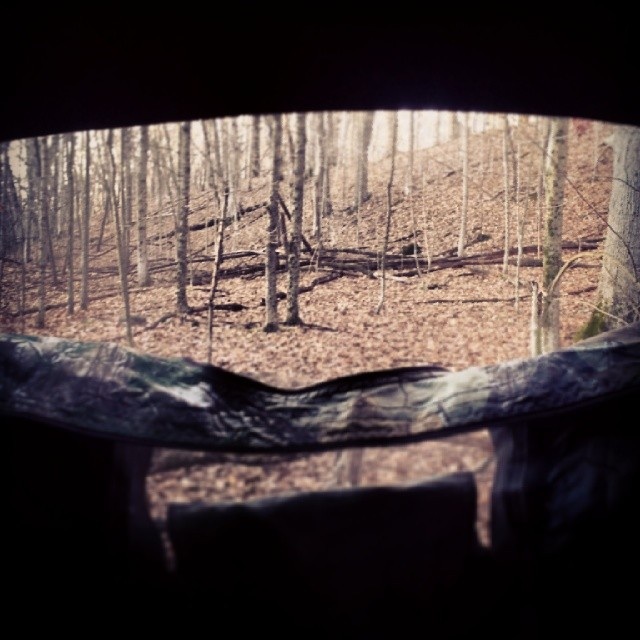
cannot be overstated. Since I was hunting in a “dog house” style blind (and had not yet learned the importance of a seat with a backrest) I needed poses that stretched my back, my legs, got my blood moving around my body, and yet could be done in a very confined space. I had about 60 x 66 inches, and I found that taking some of the yoga from my normal practice and modifying it to fit my space, really gave me the kind of relief I needed, that allowed me to be able to stay out in my blind all day long. I managed to squeeze in a mini (arms not extended overhead) Sun Salutation, a few Warrior & Warrior II poses and several of the Wide Legged, Forward Bend variations. I do think that each person should only attempt poses they are already very comfortable with when out in the middle of nowhere in your blind. It would be an altogether different kind of tragedy if you were to, say pull a muscle trying to stretch, than having to pack it in a little early from fatigue. In short, please use caution.

dog_house_blind.jpg

Awareness of your body, it’s needs and how to meet them is vitally important for any activity you engage in that challenges your boundaries. Yoga is an amazing way to get connected to your body and help you understand those boundaries. Spending time, getting committed to a yoga practice in your daily life will pay out big dividends, not just for the hunting season, but also in terms of your knowledge and connection to your own body, a centered focus of mind and a kind of clarity and flow in your everyday life that cannot be overstated.

It is also really important to prepare your body for the challenges you want to take on. Getting in shape for the hunt is just as important as scouting the perfect location. Challenging myself is definitely a big part of the joy I get out of hunting, but I need to be sure that I am reaching for those challenges in a safe way. WON also published an excellent article about getting in shape for stalk hunting, a great resource for how to get ready. Another way I get ready is to spend as much time as I can hiking in and out of similar areas to the areas I will be hunting, or going out “scouting” even if I don’t need to, as a way of insuring that I am not going to be taxing myself too 
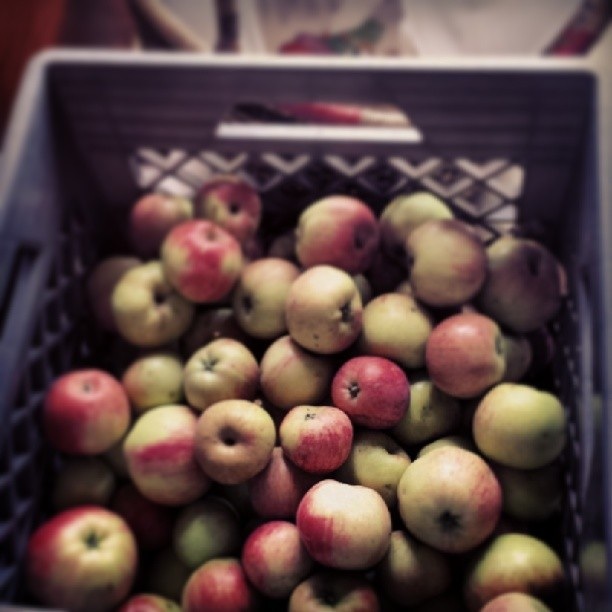
much just getting in and out of the areas I want to hunt.  This can also give me ample opportunities to forage for non-meat foods in these areas. Last year I found bushels of feral apples while out scouting squirrel territory. Along with several delicious fungi.

feral_apples.jpg

Get up early, get in some yoga, then get outside, get some exercise, adventure & maybe even get some food.

Tuesday, September 23, 2014

Preserving the Bounty

Near the beginning of my journey into helping my family have a healthy diet, I reached a point where I felt overwhelmed by the task of finding out what was in everything we wanted to eat, where it came from, how it was packaged, etc etc…. And I thought, “well hell, I will just have to grown everything myself and can it myself, and hunt my own meat and bake all of our bread from grains I grow myself… wait is that even possible? how much land am I gonna need?” Thankfully that is not exactly how it turned out. I learned a few important things on the way to where we are now.

  1. There are a few great companies that source their products carefully, package them relatively responsibly & safely.
  2. I can make some compromises, not everything, always has to be the best of the best… better is better & that is sometimes plenty.
  3. If I go to the farmer’s market I can just ask the person at the table (who has to be the one growing the food at my market) about their food, instead of having to do a lot of internet research and writing letters to customer service departments that never respond.
  4. I can grow and put up some of my own food, it is really not that hard, especially if you start small and grow as you go.

When I started canning, I began by only doing small batches of jam in my waterbath canner. Now I have a large pressure canner that I sometimes fill with a double stack of pint jars. and I need two bookcases in the basement for our canned food. I also learned that some things are better frozen and still others are best dried, so I do a fair amount of freezing and dehydrating too…

dried_apples.jpg
Apples on the dehydrator tray
I am currently in the thick of my canning season. I’ve been a little behind this year, and missed the sweet cherry harvest entirely, but have still been able to get a lot of produce put up, and I think there is still more to come. I have found that, in the gardening space available to me, I am not able to grow enough of most foods to can them, especially tomatoes. My family eats a lot of tomatoes when they are in season, so the amount I grow, we tend to gobble up before I can collect enough to do a batch of canning. It is, fortunately very easy to find local producers selling organic and often heirloom tomatoes in half bushel boxes for canning, enough so that I can even shop around for a good price.

bag_o_matoes.jpg
Some of the tomatoes from my garden


I did manage to grow more than enough tomatillos for canning this year, in fact I had so much, I had to give several pounds away to friends and family. I almost always buy about 5 dozen ears of corn to freeze, and love to make as much salsa as I possibly can, since we always eat through it and then some.

too_many_tomatillos.jpg
Merle inspecting about 20lbs of tomatillos from my garden this year
We like to U-Pick most of our fruit, which begins in May with strawberries and generally ends in September or October with raspberries, so fruits get put up all throughout the year. I’m going to share a few of my favorite methods for putting up food and will post recipes in the next few posts.

Strawberries: Frozen, Dried & Canned in Jams and Sauces or Juices

Peas & Asparagus: Blanched and Frozen

Rhubarb: Frozen & Canned into Jam with other fruit (mainly strawberry)

Tart Cherries: Frozen

Blueberries: Frozen & Canned in Jam (I sometimes dry some for baking, granola or tea, but they do not dry well for me in terms of making a good snack)

Greens: Blanched and Frozen, or Dried (dried greens are superb in smoothies, soups, sprinkled into spaghetti, or even added to muffins)

Sweet Cherries: Dried (one of my favorite snacks), Frozen or Canned in Jam

Cucumbers: Fermented into Pickles, or Canned Pickles

Broccoli: Blanched and Frozen

Red Peppers: Roasted and Frozen

Tomatoes: Roasted and Canned, Canned in Salsas, and Sauces and Dried (especially cherry or grape tomatoes)

Peaches: Frozen or Canned in Syrup (my family doesn't eat a lot of canned peaches, so I mainly freeze them now) or Jams

Melons: Dried (they taste like candy!)

Apples: Dried (my family LOVES to eat them dried as a snack, it is difficult to make enough) or Canned in Sauce or Spiced Rings

Herbs: Dried & Frozen in Oil or Pesto

Carrots, Beets, Kohlrabi, Cabbage: These all make excellent Fermented Pickles / Kraut (my family and our friends devour Pickled Carrots)

Wild Mushrooms: Dried or Sauted in butter & Frozen

Corn: Blanched or Grilled and Frozen or Canned in Relishes or Salsas

I also like to Can some Chili & Soups, to have on hand for “emergencies”

Here is a Link to Basic Canning Instructions from the USDA

corn_cobbing.jpg
Using a handy tool my dad gave me for cutting the corn off the cob

Monday, August 18, 2014

Breaking Into the Boy's Club

I have a lot that I plan to write about hunting, firearms, sportsmanship and how a woman can chart her course through all of these male dominated fields, but to get to all of that I need to begin with my experiences “breaking in” to this “boy’s club”. The first few steps can often be the most difficult.

A few days ago I wrote about finding a tribe of wild women to run with, and the sportsman’s club that hosted the local WWOW event. That club is very near my home, and seemed to hold the promise of a new community that could help me along my journey. The club runs various activities that are open to the public, including an evening handgun shooting event, designed to help beginners learn the ins and outs of basic firearms handling. This was especially perfect for one friend of mine who had attended WWOW with me and was primarily interested in learning about handguns. She wanted someone to accompany her to the evening shoots, which I completely understood, as a woman entering into this male dominated arena, which is already a little intimidating due to its potential for harm if handled incorrectly, the safety net provided by a member of your community that you already know and trust can be a vital component. I went along for the shoots and quickly got hooked and was going even once my friend stopped.

nra_shoot_badges.jpg
patches earned at the evening handgun shoots at my sportsman's club
It wasn’t long before, I started asking the guys running this event about the club and how to join. They explained the structure of dues, the need for someone to sponsor you, putting in work hours, etc. This sounded quite promising, my husband and I had been looking for a gun club to join and were running into walls including everything from thinly veiled racism to requirements to put in bartending hours (as Teatotalers and safety conscious individuals this was a big problem), as well as complicated or virtually nonexistent safety rules. Simultaneously I was working on my husband (who is a bit of an introvert) to get him to come out to the evening handgun shoots. He is far more interested in handguns than I am (he approaches firearms from a self defense minded perspective, while I come mainly from the hunting perspective), so I knew he’d enjoy it. Once convinced, he was immediately hooked and it wasn’t long before he was approached and offered sponsorship to become a member of the club. Don’t get me wrong, I was quite pleased to be joining the club, but I was a little flummoxed that he was offered sponsorship so quickly and I was unable to elicit such an offer despite having known these guys a fair amount longer, although not well by any stretch.

no_gurlz.jpg

During the process of becoming members we were told that I would be considered an “associate member” and that all of the same privileges were granted to me as to my husband, with the exception of voting for board members or holding office on the board myself. Only recently did I discover that this was, in fact, not the case; I cannot receive email newsletters or updates, am not granted membership to MUCC (Michigan United Conservation Clubs) and cannot independently log into or post in the forums, therefore I am now pursuing my own membership with my husband as my sponsor.

This serves to highlight the difficult position a woman can find herself in if she does not have a man of some relation to intercede on her behalf, to allow entry into the “boy’s club,” which is not to say this sportsman’s club in particular. Access to the entire world of shooting sports, hunting, and many other outdoors(wo)man activities can be limited if you do not either have some male friend or relative to “vouch” for you (which has it’s own issues), or have a woman who has gone before you and can help lead the way. Some of us get lucky and stumble upon a whole community of women who are ready to help guide you and share their knowledge and access. Below find a list of some resources for women interested in these fields:

Women On Target (this can be a good resource, however I still have some unresolved issues with the NRA on a number of political issue that do not necessarily even have to do with firearms)

BOW_W14_women.jpg
me with some of the women I've found while breaking into the boy's club
I promise to share much more about being a woman in the boy’s club, as I have a great deal more to share. I also strongly encourage you to share the ways you have found to connect with other women in the fields of Shooting Sports, Hunting, Sportsmanship, Outdoor Adventure, etc.

Wednesday, August 13, 2014

Finding My Tribe of Wild Women

bow_s14_kayak.jpg
Kayaking Class BOW Summer 2014

My journey into hunting has awakened my inner outdoorswoman. I knew that I loved nature & hiking, but it has gone far beyond that. Once I began exploring what needed to be done to successfully acquire meat, I realized that just the act of being out immersed in the natural world was, in itself, a gift. Being outdoors, exploring nature, challenging the limits of my physical fitness, and challenging my own ability to interpret nature, to track, navigate, identify plants and fungi and to read the forest, water, and sky were things I wanted to spend time on, in and of themselves.

wwow_logo.jpg
WWOW Logo
wwow_14_tom.jpg
Tomahawk Throwing at WWOW 2014 
I believe that this spark for adventure was, in many ways, ignited by the women who put together an amazing weekend of learning and bonding for women at a nearby sportsman’s club, mainly Gail Chapman. They call it Wild Women of Washtenaw (WWOW), this is where I took my hunter safety class, in fact I found out about the event because I was looking for a local hunter safety class, and it was less expensive to do this weekend program than to take just that one class elsewhere. In addition to the hunter safety class, I got to take two additional classes, was fed three meals, and camped out with other women seeking adventure in the outdoors. At the time, I was hoping to find another woman or two who would want to go hunting with me, because I was afraid to do it alone. I wanted a guide, a woman who had already done what I was doing and could lead me along the path. As it would turn out, no such woman presented herself, I spent the first year or two doing this hunting adventure largely alone (my husband has kindly come along on a few hunts, even though it is not really his cup of tea) yet desperately seeking another woman to share it with. I gradually became very much accustomed to having my alone time in the woods. I understand now why is was difficult to find a woman to go with me, there is nothing quite like getting out into the middle of a chunk of public land, that no one else is even interested in and spending the whole day in quiet connecting to the natural world around you without interruption, although I personally would gladly take an interested woman out hunting with me.

wwow_12_knot.jpg
Knot Work WWOW 2012
wwow_12_huntsafety.jpg
Hunter Safety WWOW 2012

At WWOW, the classes ranged from firearms and archery to beekeeping, falconry, and fly tying, there were classes in knot work, self defense, map and compass, etc… and the women I met there were wild and wonderful. I did not find a hunting partner, but I learned a lot and a fire was ignited in me to get out and explore and seek adventure. I attended WWOW for the next 2 years and discovered that the women who hosted the program got the idea from a program put on my the Department of Natural Resources (DNR) in my state (and in most other states too) called Becoming OutdoorsWomen (BOW). In Michigan they run events a couple times a year, winter and summer) as well as special activities peppered throughout the year. These programs cover much of the same things as WWOW although getting into much more adventurous territory. I personally have only attended two of their events, but am complete hooked, and plan to attend any of their programs I can. They primarily offer workshops on the north side of the Upper Penninsula in my state. I attended one in February where I learned, Snowshoeing, Ice Fishing, and Winter Camping & Backpacking. This was a weekend program, with many opportunities to meet other outdoorswomen, and opportunities to relax and enjoy the freedom offered by a dominantly female environment.

bow_w14_shoe.jpg
Snowshoeing BOW Winter 2014
bow_w14_icefish.jpg
Ice Fishing BOW Winter 2014
I also attended their May program and signed up for Shotgun, Rifle, and Archery to brush up on and refine my skills in these areas. I also took the Kayaking class, because it is something that I want to learn to be able to do on my own. It takes a specific set of skills, knowledge and equipment to be able to maneuver a Kayak, on and off of your car and in and out of the water as a shorter person, all by yourself. I was amazed by the amount I learned in the shooting sports classes. The most valuable thing I think I take away from these weekends is a strong sense of personal empowerment along with a deeper connection to a community of wild women. I may be deep in the woods alone, but as an outdoorswoman I am never alone.

bow_s14_archery.jpg
Archery BOW Summer 2014

Wednesday, August 6, 2014

Wild Turkey Recipes: Dark Meat

The leg and thigh meat of wild turkeys is seen as inedible by many of today’s hunters. I have actually read several articles and over-heard a few hunters talk about how they are only interested in the breast meat of their turkeys and will even field dress the birds by simply cutting out the breast meat and leaving the rest of the animal out in the field. Now, I am not here to write about my judgements of others and their practices (well, maybe sometimes) I can only say that for me, it would feel like poaching to kill an animal for one part only, take that part and leave the rest to rot. It feels like a disrespect for the life of that animal, I am a hunter because I want to feed myself and my family, I am not interested in squandering those resources. I also have in my mind a vivid image of what the fields of dead, rotting, skinned out buffalo may have looked like scattered across our prairie lands, or what the savannahs of slaughtered elephants with their tusks cut out, just left to rot look like. For me, the taking of a life is a serious matter and how I treat that animal speaks to how seriously I am considering that. I only want to leave in the field, parts that I cannot see a use for, and I really aspire to make that as little as possible. Which bring me back around to where I started; the dark meat from a wild turkey.

The leg and thigh meat is so tough, mainly because these are the muscles used to propel this sizable beast around the ground, wild turkeys do very little flying, and when they walk they can be surprisingly swift. Domestic birds, are bred for meat and have a very difficult time getting around, they are often caged in such a way as to prevent very much walking around, in part to keep the leg meat tender.

In searching for recipes for this meat, I did find many reports of slow cooking or braising it, and rave reviews of the flavor and texture, once properly treated. I have contended with a stewing hen or two in the past and so, the proper treatment for tough meat was not a foreign concept for me. My first attempt was to braise one leg and thigh, following recipes I found through the NWTF (National Wild Turkey Federation), here is a link to their recipes page. There is also a wealth of information over at Go Carnivore on this topic.

However, I still found the meat to be too tough, so I pulled out the slow cooker, to which I added:
- the meat I had braised, along with the other leg and thigh
- the braising juices (adding water to cover if needed)
- an onion, quartered, with the root end attached to keep them together
- 1 Tbsp of apple cider vinegar (any vinegar will do, you won’t really taste it, but I prefer the flavor of apple cider vinegar, so that’s what I use. The vinegar is important, as it is what helpt to break down the tough fibers)

I allowed this to cook for a full 14 hours, after this amount of time the meat was so tender it fell from the bones and left a deep golden broth, rich in flavor and nutrients. I drained off the broth, and shredded the meat, and discarded the bones (these could be saved in the freezer and added to the stock pot, when you make the stock from the remaining carcass, but most of the nutrients and flavor have already been pulled out). From this we made several meals; Turkey Carnitas Tacos, Turkey BBQ Sandwiches, Turkey Salad, Turkey Noodle Soup, etc… a couple of these recipes follow. I drank some of the broth (I have problems with joint pain and bone broth can be very healing) and fed some to my dog, who suffers from arthritis, the rest of the broth was used up in any and every recipe that called for broth, as well as to cook rice, lentils, etc… The flavor of the broth was so powerful that it sang through in  any dish I added it to.

Wild Turkey Noodle Soup
turkey_noodle_soup.jpg
Wild Turkey Noodle Soup
    - 2 Tbsp butter
    - 1 Medium onion, diced
    - 3 carrots sliced
    - 2 small zucchini or summer squash
    - salt & pepper
    - 2 cups shredded turkey meat
    - 8 cups broth
    - 2 cups egg noodles
    - 1 Tbsp Pesto (optional)

In a large pot, melt butter, add carrots and onion, cook till onion is soft. Add salt and sliced zucchini/squash, cook for a few minutes, until just tender. Add broth and bring to a boil, add noodles and salt and pepper. Cook for time indicated on noodle package (about 10min). Add meat and cook long enough to heat through. I like to add a little bit of pesto at the end, but it is a personal preference (I usually have a fair amount in the freezer, waiting for just such an occasion).

Wild Turkey Carnitas Tacos
turkey_tacos.jpg
Wild Turkey Carnitas Tacos
           - 2-3 cups shredded turkey meat
           - 1-2 Tbsp fat (I prefer to use bacon fat here, but any oil or fat other than butter will do)
- taco seasonings of your choice (I have a homemade blend I made riffing off of the recipe found here)
- 2 Tbsp water
- small round corn tortillas
- 1+ cup of shredded cheese
- sour cream
- diced tomato
- chopped greens (I like swiss chard or beet greens, lots of folks just use lettuce)

Add meat, fat, seasonings, and water to a cast iron skillet, bring to rapid simmer and cook on medium - high, until water is evaporated, then stirring often cook until meat becomes crisp (this can take a little while).

I use my gas burner and tongs to just scorch the edges of the tortillas and heating them so they are pliable, top with meat and other toppings as desired. Enjoy!

This meat is so superior to anything I’ve ever bought in any store in so many ways, I cannot wait for my next opportunity to bring home another turkey, I already put my name in the hat for the Fall Turkey Draw & have my fingers crossed. The amazing flavor from the dark meat on my bird and the diversity of ways we were able to make use of that meat, drives home for me the true tragedy of leaving that part of a turkey out in the field what a waste! If you are a local hunter who does not want the dark meat of your bird, send me a message or an email, I’d gladly take care of it for you!

Saturday, August 2, 2014

Wild Turkey Recipes: Bacon Wrapped Wild Turkey Breast

I promised to share recipes for some of the ways that we used the meat from the wild turkey I brought home this spring.
turkeybreast_bacon1.jpg
*

In this post I’ll share my recipe for Bacon Wrapped Turkey Breasts:

First I took care to remove each breast (which were startlingly huge) keeping as much of the meat in one whole piece as possible. I must admit that my butchering skills are anything but graceful and by the time I was done the turkey breasts were most definitely a little wonky and different sizes. I went into this expecting an altogether smaller bird than I was used to getting either from the farmer’s market or my local 4H meat auction, since those are generally a domestic breed selected for their ability to produce meat. The sheer volume of breast meat on this bird was astounding, I didn’t worry too much about any meat left on the bones since I was planning to use them for stock later. I took each breast and laid thick slices of bacon over the top, wrapping them under as I went (I used toothpicks for any stubborn pieces of bacon trying to slip off). I placed them on wire cookie cooling racks in a shallow baking pan and placed into a 350 degree oven for about 2-2.5 hours or until internal temp at thickest part of breast reads a minimum of 165 degrees.

turkeybreast_bacon3.jpg
*

These turkey breasts were Divine!!! I was hesitant to use the bacon at first, thinking that it’d be better to allow the wild turkey flavor to shine, but since I was sharing it with my family, I wanted them to love it & I knew that bacon was the way to their hearts… It worked like a dream, the wild turkey flavor held it’s own wonderfully, it just walked right alongside the bacon flavor, like old pals. The extra bacon fat imparted a succulence I have not yet found in meat anywhere. I also think it didn’t hurt that I took this bird right at the beginning of the mating season and so he had built up quite a generous fat sponge on his breast and had not yet used it up. I did take care to trim this away, but I think it still added some wonderful juiciness. These two turkey breasts were plenty to feed us dinner and provide many a turkey sandwich after the fact. 


*confession: we ate the wild turkey up so fast that no pictures remain, so the photos included in this post are from a later dinner in which we had domestic turkey breast, not wild turkey, the breasts in theses photos are much smaller than the wild ones were.

Tuesday, July 29, 2014

I'm Not Kidding, It REALLY is That Easy to Make Your Own Yogurt

I started making yogurt around the time that I got interested in making my own cheese. The whole concept of food preservation is very interesting to me, from a practical, as well as scientific perspective. The “alchemic” reactions of bacteria, given certain environments, and the ability of acidity or pressure and heat to kill off harmful bacteria. Everything from canning to drying and salting, fermenting pickles to culturing cheeses and yogurt.

I am still working on finding the patience needed for good cheese making, but since yogurt is so simple and easy to do and I love it and it is so much more delicious and better for you than the vast majority of yogurts you can get in grocery stores, I keep on making it. The best yogurt I can find in store, is a little expensive, given my extensive consumption habit, and being able to extend the life of my milk if I find I have too much to consume before it goes bad, is a wonderful thing. I have touted the glories of making your own yogurt to many friends and promised to share my methods so many times, that I figured I would share it here also.

yogurt_granola.jpg
Homemade Yogurt with Homemade Granola

One important note, before we get started on yogurt making methods, is that of the importance of cleanliness in this whole process. It is very important to be sure that all of the pots, pans, bowls, jars, and utensils coming in contact with your milk and yogurt in this process are very clean, so as not to introduce any “bad” bacteria. On the flip side of this, the introduction of any detergents lingering on any of the above mentioned gear can also kill the “good” bacteria, leading to unsatisfactory results. I would recommend cleaning with a very small amount of mild soap, and very hot water, and rinsing very well. Alternatively, you could boil any of the gear that can be boiled for about 10min to sterilize or wash with vinegar, and rinse. However you choose to do it, just be sure that the equipment is quite clean and no longer soapy.

Homemade Yogurt Recipe:

Equipment:
    - heavy bottomed stainless steel pot
    - cheese thermometer (or any good thermometer including the range 100-180)
    - large, wide bowl (optional, preferably stainless steel)
    - funnel
    - jars
    - small cooler
    - towels
    - hot water bottle, or rice bag, etc

Ingredients:
- good quality, plain Yogurt with live cultures 1Tbsp/Qt of milk used (the fewer ingredients the better) Locally, I use Thomas Organic Creamery, plain yogurt.
- Milk equal to the amount of finished yogurt you desire, preferably milk that has not been “ultra pasteurized” (pasteurized is ok) Locally, I use Calder Dairy, whole milk.        * here is a link to further information on this topic
heating_yogurt.jpg
Heating up the milk to 180

    Begin by heating the milk in the stainless steel pot, over medium heat, stirring occasionally, until milk reaches 180 degrees. Remove from heat. Cool milk to 110 degrees, this can be done in a large, wide bowl, stirring will help the milk cool more quickly.

    While milk is cooling, prepare cooler, by adding towels and hot water bottle. Prepare jars by heating with warm water (to prevent cracking). Add 1Tbsp of yogurt to each quart jar.
yogurt_cooling.jpg
Waiting for the milk to cool to 110

Once milk has reached 110 degrees, pour into each jar, cap and shake gently to mix in yogurt. Place jars in cooler, wrap with towels and set the water bottle on top. Use the thermometer to ensure that the internal temperature of the cooler stays between 100 and  116 degrees. Prop the lid open to vent if needed. When cooler is at correct temp, close and leave undisturbed for 6 or more hours. After 6 hours, the jars can be checked by tilting to the side and looking to see if the yogurt pulls away from the side of the jar. There will be some clearish liquid in the jars also, this is whey, it can be poured off, and either saved (click here for uses) or discarded. I would not suggest leaving the yogurt to set any longer than about 8 hours. Then it can be placed in the refrigerator. You can save some of this yogurt for the next time you make yogurt and it becomes a kind of daisy chain of delicious, good for you yogurty happiness.

The key reason, I find this yogurt to be superior to most store bought yogurt, is that in the manufacturing process, most products are completely decimated by over pasteurization, then the beneficial bacteria have to be added back in after the fact. The vast majority of yogurts also have a lot of additives, which I really don’t want. If I buy yogurt, I’d like it to be just yogurt.

Here is a link to the place I learned to make yogurt, and a link to some good troubleshooting. If you try this and have any questions, please do feel free to leave a comment below, I’ll do my best to answer any question.

Happy Yogurting!